≡ Menu

How to Wash Windows Like a Pro: It’s Easy

wash-windows

Every individual likes to have a spotless, sparkling window with no dust, stains, or particles over it. A clean window allows more light to enter the interior of the homes or premises they are installed in and gives an elegant look to the exteriors.

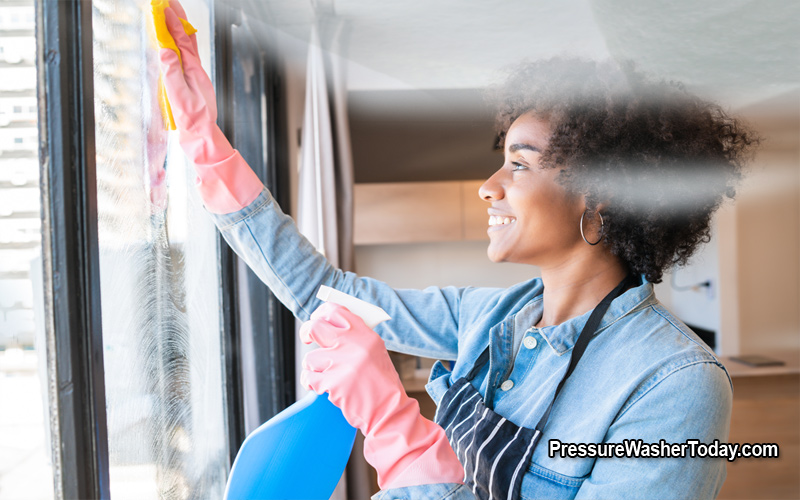
To keep your windows sparkling like new, washing them is an integral part of window cleaning. Cleaning windows on your own is an easy task if carried out with appropriate cleaning tools and cleaning solutions.

Several cleaning solutions assure sparkling results, however, some are formulated with harsh chemicals that can leave streaks and scratches on the window. It is always better to wash windows with some DIY solutions and some basic cleaning tools to avoid scratches on them.

Window Cleaning Tools

wash windows- Window Cleaning Tools

It is suggested to use the right type of cleaning tools to wash and clean windows like professionals. If appropriate cleaning tools are not used then the one may not get desired results.

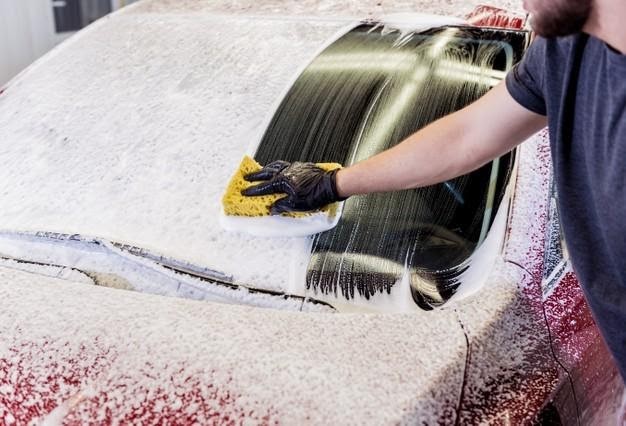
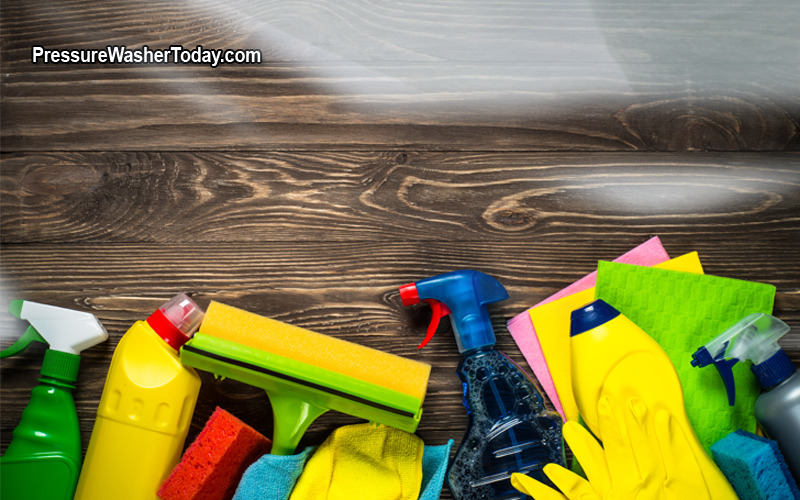
You need not invest in a complete window cleaning kit as it can turn out to be expensive. Instead, get some handy cleaning tools like a squeegee, sponges, scrubbers, rags, and a liquid dish-wash, which are easily available in the superstores. A squeegee helps to clean windows faster and more effectively as compared to traditional paper towels. 

Steps to Clean the Windows

  • Before starting the process of washing and cleaning the windows, spread some old newspaper or towels at the bottom of the windows so that the excess water and dirt residue that comes off while washing the window does not spoil the flooring.
  • Use a dry broom or a brush to loosen the dust, insect webbing, and dirt that are seeded in the corners of the window from the interior as well as the exterior of the window. 
  • Once you have dusted out all the dirt, use some soap solution to remove tough stains and marks from the window. Prepare a simple DIY window cleaning solution by mixing up a few cups of water with one-two teaspoons of dish-wash liquid and a small quantity of vinegar in a spray bottle, give it a good shake and the solution is ready to use.
  • Spray the cleaning solution a few times on a sponge or directly spray the solution on the window. Rub the window from top to bottom and from one end to the other end a couple of times to remove stains and marks. 
  • Using a steel wool scrubber would be good to pick off the tougher stains and streaks but should be used with care as it can easily scratch any protective film applied on the window. For any paint marks, scrape them off with a razor.
  • Also, you can use the DIY solution together with a newspaper to remove the grease stains from the window. Spray the solution on the window and ruffle up a few pages of a newspaper, wipe out the window with the ruffled newspaper and let the window dry out naturally. You will have a squeaky-clean window in no time.
  • Once the windows have been rinsed and hard stains are removed, wipe off the excess water from the squeegee. 
  • As the last step, take a microfiber cloth and gently wipe out any residue moisture and the solution.

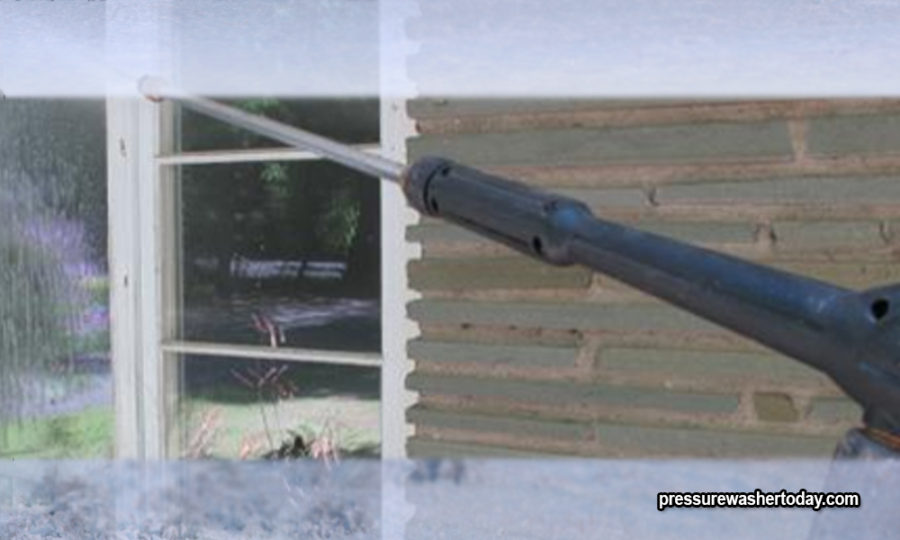
While most of the windows can be cleaned with this soap solution, consider the type of windowpanes that are being installed. For example, Vinyl windowpanes get scratched easily, it is thus important that you do not spray any solution directly on the window. Instead, dampen a microfiber cloth with water and gently wipe off the dirt.

Similarly, never use any abrasive equipment for cleaning acrylic windowpanes. Any harsh chemical or sharp and rough cleaning tool can cause permanent scratching on the windowpanes. Ensure that you always use soft cloth, preferably micro fibre cloth and avoid terry linen as they can always leave lint on your windows which make the process of window washing difficult.

Professional Window Washing Services

Professional Window Washing

Along with a quick DIY window washing every now and then, it always pays off to get the windows washed through professionals. There are several window cleaning services available in Jacksonville. A professional service provider can deliver spick and span cleaning for home windows, windows installed in commercial and industrial setups.  

Professional window cleaning systems are best for an exterior window as any dirt, dust, and debris that blocks the light to interiors and gives an uncanny look to the exterior.

Consider window washing services through professionals to get clean and sparkling windows for the windows installed at your homes, business establishments, storefronts, and other commercial properties.

Professional window washing services come with their set of benefits:

  • When you get your windows washed professionally, the service provider will have relevant cleaning tools to clean your windows inside out. They will get the right equipment and cleaning products to give your windows a crystal-clear finish.  
  • They have expertise in removing tough stains, streaks, and scratches without damaging the windowpanes.
  • The professional window cleaning process ensures that the surfaces around the windowpanes are cleaned out properly. They wipe out all the accumulated debris from the nooks and corners of the windows. 
  • Some watermarks, paint stains are hard to clean, these stains can get scratched if they are not removed properly. Pro cleaners know how to get rid of these stains and marks without scratching off the windows. 
  • A window cleaning Jacksonville Fl will have pros that will have the knowledge on how to clean out the hard water deposits that accumulate on the windows over a period.
  • Professional window washing service providers have environment-friendly, non-toxic cleansing solutions that are free of harmful chemicals and this ensures that your windows are handled safely.
  • Professional cleaners are well equipped with extension poles and ladders to reach out to the tall and highest windows installed in your homes or commercial set-ups. This ensures a hassle-free cleaning of all the windowpanes of your windows. They also ensure that while cleaning out the windows they clear out the sills, ledges grooves, and window tracks.
  • Window washing service providers are equipped with scrappers and T-bars and have knowledge on technical know-how on how to use them effectively to remove hard and caked-up debris and grime.
  • Additionally, there are water-fed extension poles that are meant for commercial use and these poles apply the technique of using purified water to clean out the windows without leaving any hard water stains. These kinds of equipment can only be used by professionals. The water used in these poles is free of mineral deposits and is chlorine-free, which ensures that water dries out completely with no streaks or stains on the windows.

Wrapping Up

As you can ease, while opting for the DIY path is effective in putting some elbow grease in taking care of your windows, outsourcing it to professionals grants your professional window washing. Aaron’s Pressure Washing is a pressure washing company based in Jacksonville, FL, and offers a wide range of pressure washing solutions.

Contributor’s BIO:
Stefy Doe is a content creator from Aaron’s pressure washing. Stefy has more than 4 years of experience in writing various types of content for home improvement and decor.

Aaron’s Pressure Washing is a pressure washing company Jacksonville can be proud of. For the last two decades, they have expanded their knowledge and expertise to proudly offer the highest quality commercial and residential exterior cleaning service. 

How and When to Clean a Dyson Vacuum Cleaner

How and When to Clean a Dyson Vacuum Cleaner

There are high chances that you use a Dyson Vacuum Cleaner for cleaning your carpets at home.  However, there is a possibility that you are not aware of the correct way to clean it. 

All Dyson vacuum cleaners come with comprehensive instructions as to how to use and maintain their cleaners.  This guide is a generic summary. However, always follow the manufacturer’s instructions if they differ from this generic guide.

You need to learn how to clean a Dyson Vacuum Cleaner at home. You can easily learn how to clean a Dyson Vacuum Cleaner by just following these simple steps.     

Firstly, you need to gather all the materials required for cleaning a Dyson Vacuum Cleaner and then you need to select an appropriate area in which you can clean it and collect the dust to dispose of. This will make your vacuum run longer and work more efficiently at helping keep your home clean and tidy. 

Materials Required

You will have to collect all the following required tools and materials: 

  • Flathead Screwdriver. 
  • Air Blower/Compressor. 
  • Scissors or Knife.   
  • Dish Soap. 
  • Paper Towel. 
  • Water. 

The procedure of Cleaning a Dyson Vacuum Cleaner

Follow the given steps to clean a Dyson Vacuum Cleaner at home:

1. Empty Your Canister

Remove the canister by pressing the button at the top of the canister which is always labeled clearly. Empty Your Canister of any debris into an appropriate bag or container for disposal. 

2. Remove the Foam Filter

Open the top flap and take out/remove the Foam Filter and set aside for later.

3. Removal of Canister

Removal of the canister will normally expose the engine’s circumference where dust may have gathered Then use Air Compressor/Blower to blow out all the dirt and dust, if any.

4. Clean Cyclone Part                              

Put the Cyclone Part over the trashcan and blow out all the dirt and dust usingAir Compressor/Blower. Be careful this part is super messy. Turn over the Cyclone Part and blow air inside as well. 

5. Clean the Canister                             

Use the Air Compressor/Blower to blow out all the dirt and to clean the canister section. 

6. Clean the Foam Filter With Cold Water Only

Rinse the Foam Filter under running water and squeeze it until clear water comes out. The filter frame usually has the washing instructions written on the side.  It especially says not to put a damp filter back in the vacuum cleaner, but to dry it for 12 hours.

7. Blow Clean/Wash Canister

If there are not instructions with your machine blow clean the canister.  If there are instructions to remove the canister, thoroughly run water through the canister. Then wash by rinsing thoroughly with water. 

8. Wipe the top of the Cyclone Under the Filter if Dirty                                     

Use a slightly wet, paper towel to wipe off the top of the Cyclone area under the filter. Dry the area thoroughly before putting the filter back after it has dried.

9. Dry the Vacuum Thoroughly

Make sure that all the components of vacuum that encounter water should be completely dry. The filter should not be put back in the machine before the twelve hours of drying has occurred.

When to Clean a Dyson Vacuum Cleaner   

You need to clean your Dyson Vacuum Cleaner twice a month apart from emptying regularly. This will help your vacuum run longer. 

When to Deep Clean or Service Your Dyson Vacuum Cleaner

The Dyson machine need to be maintained by cleaning and servicing regularly.  When and how to do it depends on your model and what you are using it for.  If you cannot find your manual and user guides for instructions, you can find the information by clicking here.  

How to Clean Your Dyson Vacuum Cleaner’s Filter                                

1. Unplug your Machine                              

Turn off and disconnect your vacuum cleaner from the wall socket. 

2. Removal of Filters                      

Now remove the Dyson Filter from the Dyson Vacuum Cleaner.  

3. Wash Filters                                        

Wash Filters under cold water only by rinsing under the water supply. Continue by gently squeezing the water out of the Filter. Repeat until clear water comes out.  The instructions are usually on the cassette holding the filter.

4. Dry the Filters                                           

Dry the Filters by leaving them in a warm place until they are completely dry. The recommended time for drying is twelve hours.

5. Attach the Filters                

Attach the Filters in the Dyson Vacuum Cleaner.  

Frequently Asked Questions (FAQs)

The Dyson Filter in the Dyson Vacuum Cleaner should be washed/cleaned once in every three months. However, check your manual for variations from this rule.
Most Dyson Vacuum Cleaners use two Filters. One is a pre-motor filter and the other is a post-motor filter. These filters mostly need to be replaced every six months to a year. If they have washable filters, then wash these filters using cold water. There are numerous Dyson vacuum cleaners, and some have more than one filter. You can find the instructions about cleaning and replacing the filters related to your Dyson model by clicking here.
You cannot vacuum the following things using a Dyson Vacuum Cleaner: 1. A Broken Glass. 2. Coins. 3. Paperclips. 4. Fine Dust. 5. Wet Food or Waste. 6. Fireplace Ashes.
A Dyson Vacuum Cleaner lasts around seven years to ten years. However, if they are well cared for, they can last up to 15 years or more.

Conclusion 

In this article I have explained to you that how and when you can clean a Dyson Vacuum Cleaner. Also, I have told you how you can clean a Dyson Filter.

Also, I have given you answers of some of the frequently asked questions such as when to clean a Dyson Filter, Do Dyson Filter need to be replaced, Which things you cannot vacuum with a Dyson, how long does a Dyson Vacuum Cleaner last.

Author Bio:
M Ehtesham Shafiq is a passionate content writer and researcher. He loves to write on different niches to explore and research new niches with authentic information. 

How to Remove Pet Stains From Carpets

how-to-remove-pet-stains-from-carpets

Everyone loves animals, or at least most of us do. Pets give loving companionship for both our families and us. They also teach kids responsibility for how to take care of others later in life. The downside to having pets is that sometimes they have accidents that cause stains on our home’s carpet.

Knowing how to deal with these stains is essential to keeping your floors spotless of any sign of stains your pets may have left behind. Follow along as we give you ideas on how to get pet stains out of your carpets. 

PRO TIP: Read this article on the best carpet cleaning methods before you start.  We know you will love it!

Potty Training

Potty Training

While this article is about removing pet stains, we must mention the best way not to have a stained carpet is to help your pet not make any. While there is always the potential for accidents, when leaving a pet locked in a room or being late home from work, all pets can hold themselves from going to the bathroom at least for a short amount of time. 

Make sure to investigate professional services if you are having issues training your pet to not “go” in the house. Now let uslook at what you can do when those accidents happen.  

PRO TIP: Want to know which flooring type lasts the longest?  Well, carpet is at the top of the list!

Removing Urine Stains 

Removing Urine Stains

Urine stains can be some of the harshest stains for your carpets and require intense carpet cleaning. Not only does it turn your carpet into dark yellow spots, but the smell of urine is strong within a home. If your pet has urinated on your carpet, here are a few ideas to remove any stains or residue. 

  • Act Quickly: Urine still in a wet state is much easier to remove than when it dries. 
  • Soak and Scrub Brush: If found still wet, use a dry cloth to soak up as much of the urine as possible. Then using a cleaning agent and a stiff-bristled brush, scrub the area until the stain is no longer visible. 
  • Use a Home Steam Cleaner: Many stores now sell small steam cleaners to remove urine and other types of stains. Instead of the old bulky carpet cleaning machines, most of these are compact and strong enough to help with a fresh stain, although they are not efficient at large or multiple stains. 

Removing Pet Vomit Stains

Removing Pet Vomit Stains

Cat owners will appreciate this advice, as inside cats are the most susceptible of vomiting, especially after eating. The best way to help protect your carpet from vomit stains is to make sure your pet’s food supply is as far away from your carpet as possible and in a place that is easy to clean. Of course, this is not always a choice but will help tremendously in the clean-up effort. 

Luckily for those that have no way of having another area to feed, pet vomit is normally thicker than urine and, therefore, mostly stays on top of the carpet fibres, making it easier to clean. Usually, a rag, cleaner, and a quick scrub will remove any signs of pet vomit. 

Tip: Be careful of purchasing cat foods that have been heavily dyed in food coloring. One, your cat will not care what color the food is, and the food coloring is a huge culprit in causing stains. 

Protecting Carpet

While covering your carpet with plastic is not an option, what is available to you are chemicals, like Scotchguard and others, that help to remediate the severity of stains within your carpet. When purchasing a new carpet ask about the options for adding a protectant to it. 

Using Natural VS Human-Made Substances

There are people who choose to use only natural cleaners to remove stains. The most popular of these are vinegar, water, and hydrogen peroxide. Even though these and other types of cleaners may be considered natural, some will still react with the fibers in your carpet and could cause issues. Before using, make a test on a small patch that is not visible to guests to see how it performs. 

Natural products will normally work but might take a bit more scrubbing to remove stains that chemical cleaners may not need. For tough stains set in, these chemical types of carpet cleaners are almost always a better option. 

Use A Professional Carpet Cleaner

Use A Professional Carpet Cleaner

Professional carpet cleaners will be your best choice for dealing with pets who cause multiple stains and have the best chance to remove odours from your home. The equipment owned by these companies is better than anything you can rent or purchase your own. 

Not only is their equipment state of the art, but the experience and training of professional carpet cleaning companies are suited to giving you the best chance of removing pet stains from your carpet and getting your home under control. 

Contributor’s Bio: Mary Beth Gossman is a freelance writer and poet. She is highly proficient in writing, editing, and all aspects of the English language. For over 30 years, she has experience in teaching at the university level including Technical Writing, Expository Writing, Professional Writing, and Composition. 

How to Vacuum Under Beds

vacuum cleaning

Vacuum cleaning underneath your bed is rarely done because it is one of the hardest areas to clean. Cleaning under bed will keep you protected from unhygienic dust particles present under your bed. You should clean under your bed either on a weekly basis or twice a month.

A large percentage of the people do not clean underneath their beds. This happens because some people do not have a proper guide on how to clean/vacuum under their bed.

There are some ever-present cleaning frustrations that may not have easy solutions, but luckily there is one of those exasperating areas that we can clean: underneath your beds. Another important fact is that for those people who eat on their beds cleaning underneath your bed is necessary.

If you do not vacuum at least twice in a month it will greatly affect the freshness of the air in your room. Let us look at how you can vacuum under beds.

Steps for Vacuuming Under Beds

Follow the following instructions on how you can vacuum under beds: 

1. Preparation

Create an open space underneath your bed and remove all the unwanted items. All unwanted things should be removed to give you a trouble-free cleaning session. 

This is an important stage in the process, you must select the right tool to clean under beds. You can use a vacuum brush just like a broom. The best recommendation is to use the vacuum cleaner brush detached from the hose for this stage of the cleaning process.  

After you have completed the above stages, do not forget to reconnect the brush to the wand and vacuum up what you have swept up.

2. Start Vacuuming

When you start use the crevice tool to vacuum the baseboards and side of your bed. You need to use straight, long and overlapping strokes that have a way from one side to the other side of your bed, with the same width. Now vacuum across the corners of your bed. Do not forget to vacuum at least a few inches around your bed. 

3. Use Air-Freshener

When you are done with vacuuming under your bed, spray air freshener under your bed to freshen the stale air and to stop the odour from spreading in your room. 

4. Inspection

Before you stop vacuuming, do not forget to examine it to be sure that you did not miss any spots. When you are satisfied with your work, unplug the vacuum, and return it to your storage. 

How Often Should You Vacuum Under Your Bed?

You do not need to vacuum under your bed every time you vacuum your bedroom, but you can clean it on a weekly basis. The best rule to vacuum under your bed twice a month. On the very lowest frequency, you need to vacuum it at least once a month.

How to Vacuum Underneath a Low Bed

How to Vacuum Underneath a Low Bed?

If you are dealing with a low bed, you may have to get onto the floor to reach underneath your bed, but it will be worth it to get to sleep in a clean and hygienic place

Follow the given steps to vacuum under a low bed:

1. Create Open-Space Under Bed

Remove all the unwanted items from underneath your bed, so you can get access to the floor.

2. Dust Under the Bed

To get rid of sneeze-causing dust particles you can use a yardstick with a sock to dust under your bed.

3. Dirt and Spill on the Floor

Use a damp flat-headed mop to clean all the dirt and spill on a hardwood floor.

4. Vacuum

Clean your floor or carpeted floor with the help of vacuum attachments.

5. Move Your Bed

You will need to move your bed if it is too low to the ground. 

vacuum cleaning

How to Vacuum Under a King Size Bed?

Vacuuming under your king size bed is rarely done because it is one of the hardest places to reach with your vacuum. 

Follow the given steps to clean under a king size bed: 

1. Preparation of Vacuum Cleaner

Most vacuum cleaners do not fit underneath your bed. Use a vacuum with a hose that will reach under the bed and has interchangeable tools. 

2. Start Vacuuming

Use the small brush to vacuum along corners and baseboards. Vacuum under the bed using long, straight and overlapping strokes that go from one to the other side of the bed across the width. Vacuum twice under the bed. 

3. Inspect

Get down on the floor and look for any remaining spots that need to be re-vacuumed. After inspection, put back the items stored under the bed, if any. 

Conclusion 

In this article I have explained to you in detail how you can vacuum under beds. I have also discussed with you: how to do vacuum under a low bed and how to do vacuum under a king size bed. 

I have also answered the most asked question on how often to vacuum under beds. I have also shared with you the names of three vacuum cleaners best for cleaning underneath beds. If you should clean under your bed twice a month you will know you are sleeping in a hygienic and clean space. 

Author bio:
M Ehtesham Shafiq is a passionate content writer and researcher. He loves to write about different niches and to explore and research new topics with authentic information. 


How to Clean Car Floor Mats Easily at Home

How to Clean Car Floor Mats

There is just something satisfying about having a clean car, not just the exterior, but the inside as well. Who would not appreciate a squeaky-clean car floor and the interior space smelling fresh?

Anyway, regardless of how careful you are, spills and dirt build-up are likely to happen. Whether by you or your passengers. Of course, you can find the perfect floor mats for your car to collect all the dirt and spillages but you will have to clean them up at some point as well. 

We, therefore, want to take you through the process of cleaning your car floor mats. Now the car mats can be made from rubber or cloth and we are going to cover the cleaning process for both.

car floor mats-Cleaning Cloth Car Floor Mats

Cleaning Rubber Car Floor Mats

If you live in colder climates where it rains and snows often, these will make the perfect option as they dry faster and prevent moisture from damaging your car’s interior.

The only downside to rubber mats is that they do not absorb spillages.

Anyway, here are the steps for cleaning rubber mats.

Step 1: The first thing you want to do is remove the mats from your car’s floor. This is because you will need to wet the mats and you do not want any of the water inside your car.

Step 2: The second step involves whacking the mats to remove debris. You can do that on a wall or any other solid surface.

Step 3: Next, you want to hose the mats down using water. This will effectively dislodge any crumbs or loose dirt. Be sure to only wash the stepping surface and not the underside that touches your car’s floor.

Step 4: Apply some soap or detergent (preferably liquid) to the mats and scrub using a rag. This should remove any grime easily.

Once, you are done hose the mats down with water again.

Step 5: Your rubber mats are now clean ad ready for drying so hang them out on a coat hanger or railing to air dry.

car floor mats- Cleaning Cloth Car Floor Mats

Cleaning Cloth Car Floor Mats

These are a little harder to clean than rubber ones particularly if they are already wet. They may even have stains or an unpleasant smell.

That is probably their biggest downside. Once, they get the smell, you must live with it until you are ready to clean the mats.

Here is what you need to do to clean them though.

Step 1: Just like with rubber mats, the first thing you need to do is take these out of your car because you do not want to get detergent or water in the car.

Step 2: Use a vacuum cleaner to suck any grime or dirt out. Do this on both sides of the mats. After that, you want to sprinkle and rub some baking soda on the mats. This removes unpleasant odours and stubborn stains.

Step 3: Pour a generous amount of liquid soap or detergent on the mats (You can also use shampoo). Take a hard bristled brush and scrub away. Once that is done, rinse the soap with clean water.

Step 4: Next, you want to apply carpet cleaner onto the mats and allow it to sit for about half an hour. Then, use a hand brush to scrub.

Step 5: Your cloth car mats are now clean and ready for drying so you can either dry them in the dryer or hang them out somewhere to air dry.

Cleaning in Washing Machine

Alternatively, you can simply toss your cloth car mats into your washer with detergent and stain remover and let it do all the hard work for you. 

Here is the process for doing that.

Step 1: As always, the first thing to do is to remove your floor mats from the inside of your car. You also want to keep in mind that only cloth car mats should be cleaned in a washing machine.

Mats with plastic or rubber parts can deform or melt in the wash and you do not want that.

Step 2: Next, you want to whack your mats against a hard surface to eliminate any loose dirt or dust and then toss them into the washer.

Step 3: You can also use baking soda for the same purpose.

Step 4: Set your washing machine to the gentle wash with cold water and toss your mats in. Allow the washer to run for 15-20 minutes and once that is done, you can take out the mats and air-dry them or let the dryer do the job for you.

Cleaning with a Vacuum Cleaner

Cleaning with a Vacuum Cleaner

You can also vacuum clean your car floor mats and this is probably the easiest way to do it.

Step 1: You want to go slow here. Starting on the far edge of the mat, push your vacuum cleaner forward to lift dirt and debris in the mat. Pull the machine back to collect the dirt.

Step 2: Another thing you want to note is that you can get your mats extra clean by vacuuming side-to-side after doing it up and down in rows.

This will help catch every bit of debris and dirt.

Step 3: At this point, you are done vacuuming and you have clean car floor mats at hand. Simply put them back in your car or store them away for future use.

Final Thoughts

If you own a car, you know that its floor receives all the dirt from your shoes as well as spillages and food crumbs when you eat in there.

Whether you have rubber or cloth car mats, you need to wash them regularly to eliminate all the debris and spillages collected. This will make your space looking clean and tidy and your space smelling fresh.

You can get rid of all the dirt by deep cleaning the mats and now that you have this article in your possession, that should not be too hard.


How to Clean Your Home and Garage with a Pressure Washer

How to Clean your Home and Garage with a Pressure Washer

Knowing how to clean your home and garage with a pressure washer is smart thinking nowadays. There may be a lot of dust and grime accumulation on the garage floors or exteriors of your home.

However, cleaning such areas without the proper tools and processes can be backbreaking. Using a pressure washer to clean is highly effective and involves less strength than other conventional methods.

A little research on how to clean your garage floors with a pressure washer will be beneficial. You will learn the technique how to get started with this cleaning tool. Moreover, using vinyl siding cleaner for pressure washer adequately tackles all the dirt build-up on the concrete floors.

What is a Pressure Washer?

The pressure washer is an exterior cleaning tool that operates with a pump to regulate the water flow from the connected hose. The pump is typically powered by gasoline or by electricity. There is a high-water pressure of 1,000 – 3,000+ PSI which is forced through a narrow spray wand outlet.

This high-pressure of water spray is powerful enough to remove a layer of dirt from surfaces. The higher pressure ensures that tougher grimes are removed with ease. So, this post will share the cleaning process of using a pressure washer.

Home and Garage Cleaning with Pressure Washer

1. Start Slow with Nozzle Size

The pressure washer is equipped with a variety of nozzles that ranges between 0-40 degree. The lower degree indicates the water stream to be narrow and more impactful.

Start slowly with the higher degree and then move to the lower ones to make the cleaning process more effective. Handle the pressure washer with ease because you do not wish to damage or gouge the garage floors or exterior surfaces you are cleaning.

2. Do not Forget to Add Cleaner

Most pressure washer models feature a special nozzle or reservoir that allows spraying a soapy liquid or cleaner solution. Based on your cleaning and surface type, various cleaner solutions make the cleaning task easier.

The multipurpose house wash is perfect to clean the exteriors like patios and decks while degreasers are excellent for driveways and garage areas. Scrub the surface in suds and leave it for a few minutes before rinsing to get the added shine.

3. Continue with Pressure Wash Brush

Be patient to allow the combo of the cleaner or soapy liquid and water to do their work. There is no need to hurry and rush to rinse the floors. Now, you can attach the floor brush with the pressure washer for sweeping away those bigger particles.

The foaming bristles of the brush will intensify the degreaser detergent or soapy solution into the larger stains. However, do not forget to evaluate the quality of the floor brush. There are brush models specifically designed for garage floors and home exteriors.

If you are using the wrong brush you will not achieve the desired result. For instance, using a carpet brush on a garage floor will run the risk of damaging the brush and not cleaning the floor.

4. Rinse Everything Clean

This is the most exciting part of cleaning with a pressure washer. Get the pressure washer to the maximum level and start spraying the areas. However, be careful to adjust the nozzle if you have an underlying soft surface like plastic, paint, or putty.

Even though the surface seems durable, a pressure washer will dislodge any loose material. The efficacy of cleaning the surface depends on the complexity of dirt and contamination and might require repeating the process a few times. The selection of the right cleaner determines the success of the process.

There is no need to put that extra scrubbing effort as the entire process operates on the pressure of the appliance. Moreover, the risk of flooding the area is less as the pressure washer uses 80% less water compared to garden hoses.

5. Get the Finishing Touches

No matter how pro you become in operating the pressure washer, there will be still some water left on the surface. Here, you can consider using help from a squeegee or wiper to finish off your cleaning task.

Although it is difficult to get a uniform shine on the surface, it will get rid of the excess water. It will also avoid splashing water on drywalls. 

6. Take Adequate Precautions

You might think a pressure washer to be a reliable cleaning tool, but it is not totally safe. The pressure washer is an immensely robust appliance and accidents can occur for unexpected reasons. 

So, take adequate precautions by wearing close-fitting thick clothes, boots, and eye gear. If you use the electric models make sure you keep the connections away from water contact. On the other hand, gasoline models release carbon monoxide so operate it in the open air. 

Key Takeaways

That is a summary of the most critical pressure washer cleaning tips. Make sure you follow the steps properly to avoid the chances of mishaps. With a pressure washer, you can clean your home and garage in a swift, practical, and effortless way. 

Author Bio: This is a guest post from Kevin Jones. He writes: “After over a decade-long career in retail I learned a lot about people and what they think they need, what they truly need, and how to bridge the difference between the two. And that is easily one of the most valuable skills to have.”  For this contribution, Kevin writes for Home Cleaning For You .


5 Questions About High Rise Building Pressure Cleaning Answered

Pressure cleaning

The build-up of atmospheric pollutants on the surfaces of a building is inevitable in a city. Buildings located near a highway or in an industrial zone are exposed to higher air pollution levels than others. Those near water are also exposed to higher moisture levels, which leads to mildew or algae issues.

To combat this, pressure washers can be used. Strong emissions of water come from a pump to clean windows or the facade of high rise buildings. The water can be used hot, cold, or as steam. The force causes debris and dirt to fall away from windows or the surface material.

Let’s look at some of the most common questions building owners ask.

1. How Often Should a Facade Be Cleaned?

The short answer is that building facades should be cleaned annually. Sticking to an annual schedule will ensure that grime and dirt don’t cause staining, which is more difficult to remove. Leaving residue for too long can lead to damage to the façade too. Glass can be permanently stained if it’s not cleaned often enough.

There are factors that come into play that affect the cleaning schedule.

The three common questions you will be asked when a contractor is assessing the needs to clean a building are:

  • Where is the building located?
  • What are the atmospheric conditions it is exposed to?
  • What materials is it made of?

2. What Cleaning Methods Can Be Used on a Building Facade?

Depending on the building in question, one of these methods will be recommended: chemical, a non-chemical option, abrasive or a combination of these methods.

Non-chemical water pressure is best used when you want to get dirt to loosen and wash it away. For an area with heavy stains, a cleaning agent such as detergents will be needed to remove dirt.

Pressure washing is very effective because the intensity can be adjusted to suit the needs of the job. Surfaces, like limestone, will need special chemical cleaners used with lower pressure and high heat.

3. What Apart From Pollutants Can Damage a Building?

One of the sources of damage to the façade of a building doesn’t come from the atmosphere at all. It’s right there sitting in the building itself. Minerals can come out of the stone, brick, or masonry, or the windowsills.

The salts and minerals leak out of the main substrate. They are then carried or washed onto the façade by wind or rain, leading to staining and corrosion.

Pests are also a common problem. Birds, insects, and even rodents may settle in crevices or gaps in a building façade. They can find cozy nooks and crannies to make into their home. Droppings then lead to staining and damage.

4. Why Is Rope Access Window Washing Often Recommended?

Firstly, it is the most versatile option for cleaning windows of high-rise buildings. The team can access hard to reach places by simply adjusting their setup. This includes spaces on window sills, balconies, and crevices. They don’t need scaffolding or other equipment for the job. This method also minimizes the impact on the people that live or work in the building.

5. How Much Does High-rise Window Cleaning Cost?

When you are quoted, the contractor will take the following into account to come to a figure:

  • The type and height of the building
  • Accessibility
  • The weather

Think of it like this. They will assess how much their team will be able to clean in a day and then factor this into their rate per person per day. They will likely need a minimum of two to three crew members. Workers cannot work alone for safety reasons.

The higher the building, the more costly the rate because of the additional safety processes and work required. The weather is also a factor. Teams have to ensure safety comes first, so they assess the wind’s direction and may need to change their position accordingly, which takes time.

Your contractor will likely assess the job based on a minimum charge of two workers for three hours, billed at a lower per hour rate for any time over this. Unfortunately, they’re unable to give a fixed rate pricing for high-rise window cleaning because every building is unique.

A site inspection is always necessary before they can give you a number to work with. They will check access, anchor points (including testing and certification) and equipment.

If your building has been well maintained, or cleaned in the past six months, it will cost less than a neglected building. Sticking to a schedule of cleaning the façade or windows twice a year will minimize your expenses over time.

If you have questions about cleaning your building, it’s worth asking for recommendations from those that have similar buildings to yours. If they have found a contractor that gives them the results they want at the cost they can afford, you can benefit from their experience. Once you have the contractor’s details, ask them how your building differs and what specific factors need to be accounted for.

This is a guest post by Lara Graham

9 Magical Carpet Cleaner Tips to Remove Old Stains And Refresh Your Carpets

magical-carpet-cleaner-tips

Removing old stains from your house carpets has got to be one of the toughest jobs. When you are scrubbing the old stains is probably the only time you wish you had fresh stains to deal with!

Carpet flooring gives you comfort and warmth unlike any other flooring option out there, but it comes with its perils. In general, carpets can absorb fluids fast and that is the primary reason the stains set so well.

If any of the stains reach the padding underneath, the challenge of getting it out is even greater. But let us face the reality! Either you must replace the entire carpet or do something about restoring it. Moreover, a soiled carpet is not particularly good for the aesthetic appeal of your house.

Keep calm that you are not alone in this. Although hiring the best carpet cleaners in Arlington VA continues to be the best solution, there are ways you can get rid of the stains on your own.

Here are 9 magical carpet cleaner tips to keep with you and probably your generations to come! Unless some highly advanced DIY carpet cleaning kits are designed.

1. Mix A Household Carpet Cleaning Solution

One of the best ways to handle old carpet stains is to mix a magic carpet cleaning solution. You will need a spray bottle to pour the mixture and spray it on the target regions. You must mix the following ingredients in the given proportion.

  • 3 cups of hot water
  • 1 tablespoon of baking soda
  • One cup of white vinegar
  • 1 spoon of laundry detergent

Mix well until the baking soda and detergent are completely dissolved. Once it is properly mixed, pour it into the spray bottle.

This magic solution can help you get rid of almost any old carpet stain. All you need to do is to spray it generously and let it soften the stains. You can use a scraper to remove any residues or solid chunks.

For the stains without any solid residues, the solutions chemically break down the stain. You can scrub it with a soft brush and then vacuum it. Let the carpet dry properly. Use warm and clean water to rinse away the chemical residues. 

Another tried and tested method is to cover up the carpet with baking soda. Spray vinegar and water mixture over it and let it stay for some hours. If necessary, scrub it gently. Use a vacuum to remove the powder. You are all set to bask in the glory.

Following are some tips and tricks to deal with the specific nature of carpet stains.  

How To Remove Old Urine Stains?

2. How To Remove Old Urine Stains?

Our furry companions can be a source of joy at any given time but what is not so great about them are the messy carpet accidents. No matter how well-trained they are, there is always a chance of a pet mess. It is highly recommended to get rid of urine while it is still wet but at certain times, you are not present at the spot to do it.

 When you smell it later in time, removing the yellow stains is a cumbersome task but it is possible. Mix equal part of white vinegar and water. Spray it on the stains. Take some paper towels to absorb the moisture.

 Repeat this step several times until you feel that the yellowish spots have disappeared. Now pour some baking soda over it and let it sit for a few hours. It will absorb the odours and you are good to go.

How To Remove Blood Stains?

3. How To Remove Blood Stains?

Use a small container to mix up the following ingredients.

  • One cup of hydrogen peroxide.
  • Half cup of dish cleaning soap.

Stir it to make a homogenous mixture. Apply it carefully over the stain. Make sure you are covering the edges. Let it sit for a couple of minutes undisturbed.

Twenty minutes’ work well for most of the old bloodstains. Take a clean cloth and blot the stain. Do NOT scrub it. If you can still see some oxidized parts of the stain, reapply the mixture and repeat the blotting steps until done. Or hire the best carpet cleaners. 

How To Get Rid Of Coffee Stains

4. How To Get Rid Of Coffee Stains?

A coffee stain can be a nightmare, especially for people dealing with light-coloured carpets.  If your carpet is not at risk of bleaching, take 3% of hydrogen peroxide in a spraying bottle. Apply the chemical over the stain and cover it with a damp white cloth or towel. 

Put your steam iron on full steam and put it down the towel right above the stain for about 15 seconds. Remove the towel to see if it has absorbed any of the stains. If not, apply more hydrogen peroxide and repeat the steps. Keep changing the towel until the coffee spot is invisible.

How To Remove Red Wine Stains?

5. How To Remove Red Wine Stains?

Pour some club soda on a clean white towel and blot the stain. If it starts to dissolve the stain, keep repeating until the spot is clear. 

If club soda is not working for your carpet, get back to the magic cleaning solution described earlier. Spray it over the red wine stain and let it soak for 15 minutes. Absorb the diluted stain with a clean paper towel or soft cloth.

How To Remove Dry Paint Stains?

6. How To Remove Dry Paint Stains?

Use hot water a little bit of detergent soap to soften the dry paint stain. Use a knife or a pin to scrape off the softened paint.

7. How To Remove Ink Stains?

Wet a piece of clean white cloth with concentrated isopropyl alcohol. Dab it on the ink spot. Now use a moisture-friendly vacuum to absorb access moisture.

8. How To Remove Hardened Wax And Greasy Substances?

Use ice to freeze the wax and then remove it with a hard scraper. The magic solution works well for greasy stains.

Get Rid Of The Lingering Carpet Odours! carpet cleaner tips

9. Get Rid Of The Lingering Carpet Odours!

Pour baking soda over the entire carpet. Let it sit overnight and vacuum it in the morning to get fresh carpets.

Disclaimer and Warning

This is a guest post article and we have not tried or tested the recommended solutions listed by the writer.  We are aware that there are many Do It Yourself carpet cleaning solutions and that authoritative Consumer Groups such as the United Kingdom’s WHICH issue reports on the subject.

You can read the WHICH reports by clicking here. Overall, the best solution is to seek independent professional advice for stubborn stains and odors.

The best selling Amazon product for pet stains and odors shows below. Click on the icon to read more.

This is a guest post by Ella James

How to Wash Your Car Like a Pro – 7 Sensational Ideas

wash your car

We all want to make our vehicles look as classy as possible, don’t we? One of the best ways of showing you have got a high-class car is to wash it in the best possible fashion.

Washing a car is not a straightforward task for a non-technical person, but the task can be done without any hassle by using the right tactics.

We know you are worried if the paint or finish of a car gets damaged while cleaning it at home. There is nothing to worry about, as we have got it covered for you.

Here are some of the most sensational ways that can help you clean your car like a pro:

1. Choose The Right Tools

Having a car in today’s world is a necessity because there is no way you can travel safely without having your own automobiles. When you keep a car, it is necessary to take good care of it, and washing a car needs to have the right and appropriate tools.

car wash

Don’t you know about those tools and gadgets? Well, you can use a spongy foam, soft bristle brush, microfiber towels, undercarriage washer attachment, etc.

These are some of the tools that cannot only help you wash your car in the best possible fashion, but there will not be any chance of getting it damaged.

Moreover, it is always best not to task any risk in terms of your car washing gadgets selection to avoid any possible damage to your automobile.

2. Choose The Right Soap

You might have heard from the experts to use detergent to wash your car – but it is one of the biggest misconceptions because a detergent can damage your vehicle while washing. Detergents are basically meant to wash dishes because they have various chemicals.

Choose The Right Soap

Those chemicals cannot only damage your car’s exterior but dull the overall finish of your automobile. So, we recommend you use those soaps that are specifically meant to wash cars.

Those soaps will not damage your car’s finish and make you wash your car in the best possible fashion.

3. Rinse Your Vehicle Carefully

To remove the dirt and grime from your car, rinsing is as essential as anything else. Do you need an expert opinion? We suggest you have two buckets at the ready, so one can be used for rinsing your car, and the other one to get a batch of clean and sudsy soap.

Carelessly cleaning cars is always dangerous because you may scratch the paint in the process. So, rinsing is the ideal way of cleaning your car without damaging it at all.

4. Do not Wash In Direct Sunlight

Have you ever heard of the fact that cars should not be cleaned and washed in the sunlight? Do you know the specific reason for that? Let us explain to you why. When you clean your vehicle, it needs to be dried off steadily, and sunlight can make your car to dry as quickly as possible.

Do not Wash In Direct Sunlight

This is the reason you should not wash it in direct sunlight to give your car enough time to dry itself. The metal of your car gets hot, and the use of soap and water on heated metal will leave spots on your car.

So, one of the most ingenious ways of washing your car is to choose a dry environment to prevent the formation of spots. One more thing; always rinse your vehicle with a spray rather than using a jet blast of water.

5. Clean Windows And Glass

The cleaning of windows and mirrors will not only make your car look aesthetically pleasing but important for safety perspective. Can you even think of driving a car that has mirrors covered with smudges? BIG NO!

So, make sure you keep an eye on cleaning the windows and glass of your automobile to give your car a stunning look. Have you got any idea that the cleaning of standard and tinted glass needs different methods and strategies? No? Let us give you an overview.

Clean Windows And Glass

The cleaning of standard glass is straightforward, and on the other hand, you need to have a combination of paper towels to get the job done for a tinted glass.

6. Clean Car Interior

The cleaning of the interior is as important as cleaning the exterior. There is no way your drive can be fun if you have a dirty interior. Now comes the question, how to clean your car’s interior?

First, you need to get rid of all the rubbish from your car (make sure you do not remove any of your essential documents while removing extra material and papers).

Clean Car Interior

Once the rubbish stuff is taken care of – you need to vacuum your car. And when you are vacuuming your vehicle, try to get into each nook and cranny of your car.

People often ignore the area underneath the seats, and we suggest you keep an eye on it. An electrostatic cloth can also be used to clean your car’s interior.

7. Clean Car Exterior

The exterior of a vehicle defines its image. Nobody likes to drive a car that is full of dirt and grime. No matter how expensive your automobile is, there is no way it will look pleasing to the eye, having a lot of dirt on it. So, exterior washing is the way to go.

Clean Car Exterior

Make sure you pressure wash the exterior to get your vehicle cleaned without any hassle. The wheels and the side-mirrors need most of your attention because these are two of the areas people often ignore when they clean a vehicle.

We recommend you choose the best possible soap and a microfiber cloth to ensure a safe and risk-free cleaning process.

Final words

Washing the car can be a tricky job to do, but not if you have the right guidelines. We have explained some of the most ingenious ways of washing your car at home. Once you apply them, you will be astonished to see the results.

Image Source: Freepik

Author’s Bio: Heather Clinton has been writing blogs and guest posts for more than 5 years. Other than that, she’s a travel enthusiast. Some of her favourite hobbies are gardening, painting, and book reading.

Using a Hot Water Pressure Washer in Winter

Hot Water Pressure Washer

Very few people are fond of cleaning, while most do it out of necessity. Unless you are least bothered about how the cleanliness of your home, there will always be something that needs to be cleaned. Especially if you have children, it is crucial for their hygiene and safety that you keep your home clean.

So which substances would you want to clean from an object or the environment? The answer is anything that brings harm to you and your family or does not look appealing if it stays where it is. Examples include dirt, mud, infectious bacteria, ice, oil, and grease.

Cleaning can be done in various ways, and a lot of tools can be applied to the process. Different tools and machines exist for different substances and surfaces. But there is one that removes all the substances mentioned above and many others.

Hot water pressure washers are useful in cleaning concrete, bricks, wood, heavy equipment, and machine parts. They are particularly useful in removing tough stains that cannot be removed by other methods.

We will look at the reasons why they are so effective later in this article. First, let us look at how hot water pressure washers are useful in the winter season.

Hot Pressure Cleaner for Winter

Winter is a time when you become lazy and inefficient. You automatically feel less productive during the short, cold days. However, if you live in harsh weather conditions, you will not want to be snowed in.

It is a terrible thought that you wake up in the morning and get ready to leave for work, only to find that you cannot move your car because of the deep snow around it. Or even worse than that, you are not able to open your front door.

Unless there is an extraordinary snowstorm, these things do not happen overnight. If you are efficient in removing the snow as it builds up, you will not have to face this mess. You will have to solve these problems yourself as the sun will not be there to help you either. Sunny days are a rarity in the winter in some areas.

Ice will not cause the same issues like snow, but it has its own share of danger that it brings. Black ice is a well- known winter hazard. The primary reason why it is extremely hazardous is that it is invisible and forms a thin layer on driveways, sidewalks, and roads. People easily slip and fall due to this perilous black ice. Thousands of road accidents are also attributed to black ice each year.

Moreover, if we talk about driveways, there is a high risk of slipping and falling for you and your children. You cannot do anything about the ice on the roads as it is the responsibility of the city authorities but what you can do is, take care of your own driveway. Buy a hot water pressure washer, and it will do the magic. It is incredibly useful in removing ice and snow from driveways.


advantages of a high pressure washer

Advantages of a High-pressure Washer

Now you do not have to spend hours trying to remove stains from surfaces. Previously, de-icing pavements and driveways also used to take a great part of your day but not anymore. The main advantage of using water at high pressure is that it hits the surface with a greater force. Thus, forcing the substance off the surface much quicker.

Furthermore, you can also wash trucks and large machinery with a high-pressure cleaner. The oil and grease stains need to be scrubbed hard to make them vanish. Instead of doing the dirty work with your hands, take the help of high-pressure washers.

Scrubbing by hand can be very time consuming, and you still will not be satisfied with the level of cleaning achieved. High pressure water cleaners are quick and effective.

In addition to saving time, you can also save money by using fewer cleaning agents. Agents such as soap and detergents are used to chemically break down the materials you want to remove.

After breaking down, they are easily dissolved and removed by water. Using water at a higher pressure requires less amount of cleaning agent for the same task.

Power Washing for Removing Snow

The snow that accumulates on rooftops and driveways can be blasted off with a high-pressure washer, also known as a power washer. Power washers use water at a high pressure to maximize the impact with which it hits the snow. However, there are a few considerations to keep in mind when it comes to power washing.

Water is heavy (8.34 lbs. per gallon) and can be absorbed into the snow on your roof. This can cause cracks to appear in your roof and, in extreme cases, cause the roof to collapse. Even small machines can force out around 3 gallons of water per minute.

Imagine the extra weight you are putting onto your roof! While you power washes the snow from your roof, you need to be extra careful that water does not accumulate. Wash small portions at a time to avoid absorption of water by a large surface area of snow.

Other Considerations

Other things you might want to consider while when using pressure washers to wash snow are:

1. Protecting yourself from the cold: Surely, you do not want frostbites while working outdoors. Snow cleaning can be hard work, especially in harsh and chilly weather conditions. Wear multiple layers of clothing to keep yourself warm. Also, wear waterproof gloves to protect your hands and thick rubber boots to avoid slipping. Your health and safety are the most important.

2. Preventing hoses from freezing up: When the temperature falls below the melting point of ice, water in your hoses and pipes freezes up. To prevent this from happening, run hot water through the pipe once every day. You can take hot water from your washing machine or other appliances that use it.

3. Choosing a suitable time: It is best to clean your driveway or roof at a time when there is available sunlight. You might want to get done with your chores early in the morning, but the sun can help speed up the process around noon when it is at the top of its arc.

4. Storing the washer properly: It is best that you store the pressure washer in a warm and dry place. However, if you have no such option, make sure you put anti-freeze in the pipes and motor. Residual water left inside can freeze and expand, causing the machine to break. Here is a video explaining how to winterize your pressure washers.

Dealing With Ice Dams

Icicles hanging from the edges of your sloped roof may look pretty, but they can be dangerous as they lead to the formation of thick ridges of ice. Such build-ups are known as ice dams. Learn more about the formation of ice dams and how to cure them on the University of Minnesota Extension Website.

The question is, is it advisable to use hot water pressure washers for treating ice dams? This technique is quite effective but should be carried out by a trained professional.

Using pressure washers to remove snow from the roof yourself can be dangerous but even more so for the removal of ice dams, as it requires a larger quantity of water. Trained individuals know how to avoid the accumulation of water on the roof, and they can effectively take care of the process.

If you live in an extremely cold climate, it is worthwhile to look for permanent solutions for dealing with ice dams.

The High-temperature Advantage: Why Choose Hot Water?

Pressure washers can work with both hot and cold water. But can any washer accommodate hot water? The answer is no. Some pressure washers are specifically designed for hot water. Those that are not designed for this purpose can be damaged if the temperature of the water flowing through them crosses a certain temperature.

The next question is does it make a difference if you use hot or cold water in your high-pressure washer? Yes, of course, it does. It makes all the difference. Especially in the winter, hot water is much more useful. To melt the snow and ice, you must raise their temperature above the melting point. What better way there is than to use hot water?

You can also use hot water to thaw frozen pipes and hoses in your home. Take water directly from the output of a water heater and make it flow through the frozen pipe. This will cause the pipe to become functional in only a few minutes. Moreover, hot water is more effective in removing grease and oil stains, and bacteria from surfaces.

Let us look at this scientifically.

Scientifically Speaking

Cold water is seldom used for tasks such as washing clothes and dishes, and the reason for this is easily explainable. Increasing the temperature of the water molecules increases their kinetic energy. This leads to the faster movement of molecules.

These fast and energetic molecules are more efficient in reacting with substances because most chemical reactions tend to occur faster at a high temperature.

The molecules of the substance you want to remove are broken down and dissolved in hot water. In addition to that, heat reduces the surface tension of the dish or cloth. This allows water to further penetrate the substance that you want to remove.

A similar scientific logic can be applied to cleaning other surfaces using a hot water cleaner. While you are cleaning the snow and ice from your driveway, you can also use hot water pressure washers to clean your vehicles and machinery. Any ice build-up will be removed, and stains will be washed away due to the wonderful effect of high temperature.

Furthermore, hot water kills bacteria and other infectious microorganisms. So, it can be used to sterilize surfaces along with cleaning them. Also, heating water to a temperature above the boiling point produces steam that effectively kills microorganisms and removes stains too.

How to Use Hot Water Pressure Washers?

To be the most efficient, take care of your technique while cleaning snow or ice with a high-pressure washer. Here are a few tips to remember:

  • If there is deep snow on your driveway, it is best to shovel a few inches by hand before you use a machine.
  • Add some salt to the ice before you start cleaning. The salt assists in the melting of ice. Follow this link to learn more about why salt is used for this purpose.
  • Constantly move the spray back and forth on the snow or ice surface.
  • Try to go layer by layer, as it is the most efficient method.
  • Use a nozzle with a wide-angle as it will speed things up for you.
  • Remember to discard the wash water properly. If it leaks onto the pavement, you will just be making more ice while trying to remove it.

How Does It Work?

There can be various kinds of heating systems installed in Hot Water Pressure Washers. Mostly a fuel such as natural gas or kerosene is used to heat the water to around 200 degrees Fahrenheit. A pump circulates water constantly, which causes pressure to build up inside the machine.

To release this pressure, you need to press a trigger that is on the long arm of the washer. This forces water through a narrow nozzle at the end. Aim the arm at the snow, ice, or any other surface to wash.

Caution: Use hot water pressure washers in well-ventilated areas. Wear protective goggles and make sure that you do not spray the water on yourself or others as it can cause severe burns.

To Sum It All Up

The purpose of this article was to explain how a hot water pressure washer can be used. We hope that you learned how to use this cleaning device in the winter efficiently and understood the rationale behind using high pressure and high temperature.

If you are interested in buying a hot water pressure washer for your home, check out our website for reviews on the best products available and a complete guide to buying a power washer.